Today starts my trip to the concrete jungle that is New York City. We actually start in Boston then head to New York on Friday, but either way, the trip has officially begun! Fortunately I have called in the big guns and had some of the best bloggers around take my place while I am gone. (Though you'll still see me around here and there.) I won't tell you the order of the bloggers so each day check back to see who the surprise blogger is of the day! Today we are starting out with a super fun little DIY by Paper Garland. Enjoy!
I can’t thank Allison enough for inviting me to guest post on her fabulous blog! One ofmy favorite (of oh so many) things about Engaged & Inspired is the incredible archive ofgorgeous details, shoots, and pretties just aching to be recreated by other special brides,so I thought I would take this opportunity to add an entry into her stunning collection!
I love to see a couple incorporate a hobby that they share into their wedding. I think apeek into what makes the couple happy in their daily life can make the wedding an evenmore joyful affair! Created especially for a couple who share a love for painting and art,this painter’s palette centerpiece is created in two easy parts and is such fun to make! Ican’t wait to walk you through, so let’s get started!
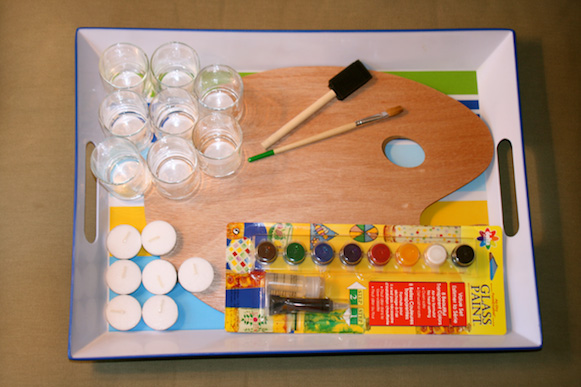 For the centerpiece, you will need:-Wooden painter’s palette-Transparent Glass Paints (I used Delta)-Sponge Brush-Paint Brush-7 tea lights-8 votives (7 + 1 to practice on!)-Newspaper to work on
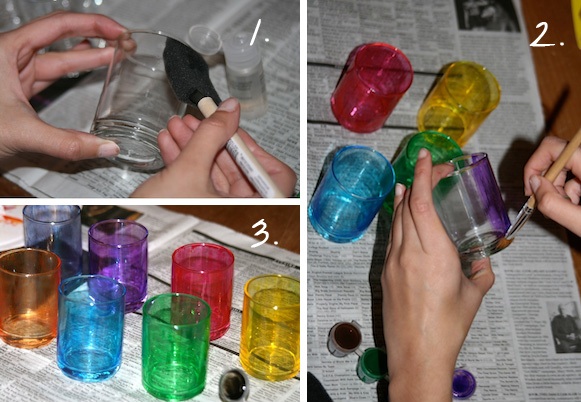
- Prime the votives: The Delta Paint kit comes with a primer bottle. This step helps thepaint stick and dry faster. The primer dried within about 20 minutes and the votives wereready to be painted.
- Paint: I am a very novice painter and these paints were so easy to use! I recommendlong, smooth strokes and applying one coat per votive. However, the paint is not tooquick-drying so if you desire a more saturated color, go for two! Let dry for at least 1hour.
- Admire your work: I chose a Roy G. Biv color scheme to tie into the art theme. Ifrainbow isn’t your thing, I also think it’d be great to use your wedding colors instead!
While the votives dried, I had the opportunity to get to work on my easy-peasy floralarrangement for the center of the palette!
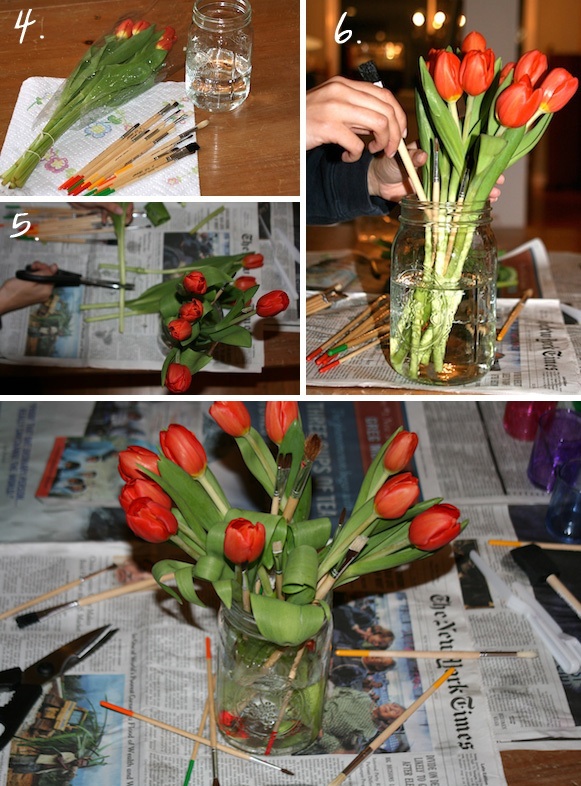
For the floral arrangement, you will need: Simple long-stemmed flowers that make you smile-Paint brushes of varying shapes and sizes-Mason jar-Sharp scissors.
- Make sure all you need is close at hand: You’ll be too excited to see the finishedproduct to work slowly!
- Trim your stems: I wanted this arrangement to have a staggered, uneven look (muchlike paint brushes dropped into a water cup!) so I made sure the tulips were slightlydifferent lengths and not so tall that they overpowered the paint brushes. Play with it tosee what you like!
- Decorate: Arrange the flowers and brushes in beautiful disarray in a water-filled masonjar. I suggest using rubber band or floral tape to discreetly secure the brushes at theangles you want them to stand.
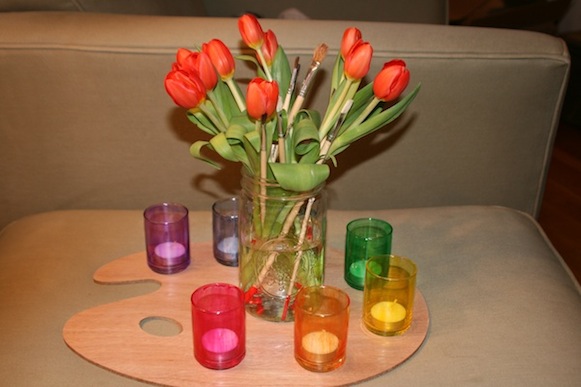
By the time your arrangement is complete, the votives should be nearly dry. Pop a tealight into each one and arrange them in your desired pattern around the perimeter of thepalette. Place the floral arrangement in the center of the wood and you’re done: an artsycenterpiece that’s as personal as it is beautiful!
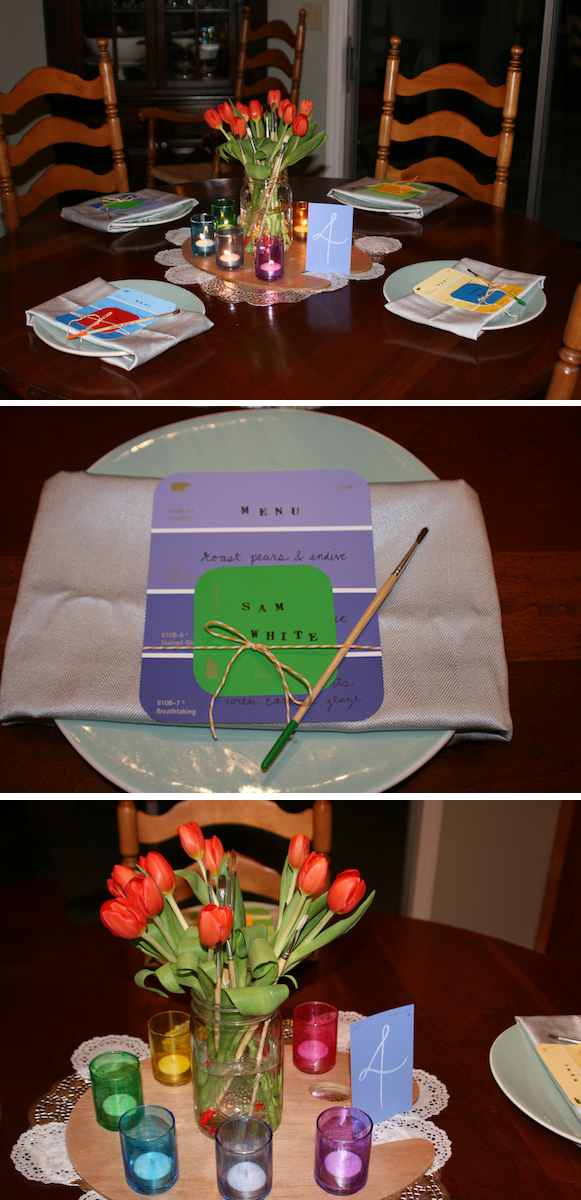
Et voila! With a few extra touches on theme (but not too many!) like these paint chipmenus, place cards, and table numbers inspired by a feature on Bride Goggles, this art-themed table setting is easy to achieve and makes a great conversation piece for your guests!

Brides: Looking for wedding vendors? Check out The Inspired List to find the vendors who bring your wedding inspiration to life.
Vendors: Have you signed up for The Inspired List yet? Check it out right now and make sure you take advantage of the December Deal to save some money!
Brides:

